Wednesday, December 09, 2020

Quick and Easy Beef Stew


It's wet, cold and mucky days like today that make me wish I'd made a bigger pot of beef stew last night.

Seriously, the easiest recipe on the planet.

There's no measuring, no weighing, no detailed instructions. This is a a real country-style pot of comfort food that packs a punch with flavor. Guaranteed.

You can save some time if your supermarket sells prechopped stewing meat, onions and carrot, and get one of those squeezy tubes of fresh garlic.

Ready?

QUICK AND EASY BEEF STEW

Ingredients

about a kilo (2+pounds) of chopped stewing beef
a big onion, roughly chopped
a big carrot, roughly chopped
3 cloves of garlic, roughly chopped
2 generous tablespoons of mixed dry herbs
half bottle of good dry red wine (I used merlot here but also use Medoc)
equal measure of beef stock (not broth) as wine
2-3 tablespoons of plain flour
cooking oil
floury potatoes, about 2 tennis ball size per person

Instructions

Preheat your cooking pot with the oil. Toss in your meat and flour together and give it a good stir. Be sure the meat gets well-covered. When the flour has browned and the meat looks like it's startint to cook, toss in the rest of the ingredients.

Stir well, then cover and bring to a boil then turn down to simmer and cook for 90 minutes to 2 hours, or until the meat is tender and falling apart. Pretty much forget about it, but set your timer. By 90 minutes, your house should be filled with the smell of the stew.

Just before it's done, put the potatoes in the microwave (should be less than ten minutes). When they're done, roughly chop them up in a deep bowl and mash to break them up a little before ladling on the stew.

*Tip: the better cut of meat, the tastier it will be. I prefer skirt steak (not flank) when I can find it

That's it. 10-15 minutes prep and the meal is done in about two hours. If you want to eat at 7pm, get it in the pot for 5pm. That's it

Serves 2 to 4

And you have leftover wine for the table.

No matter how you say it, it's...

Ithe maith!
¡Buen provecho!
Buona mangiata!
Gutes Essen!
Bon appetit!
Bwyta da!
Liánghǎo de yǐnshí!
Dobré jedlo!
Ukutya okumnandi!
Khoroshaya yeda!
Yoi shoku!
'akl jyd!
Goed eten!
Good eating!


Thursday, September 24, 2020

The original Lucy and Ricky

My grandparents were Lucy and Ricky before Lucy and Ricky were a thing.

Roberta and Reyes in their new home

My grandmother, Roberta/Bobbie, was of Irish/German extraction and the daughter of migrant farmers who followed the work between Wyoming and Colorado. They eventually moved to the Central Valley of California not long after the Great Depression for better work and where she was born. When her parents eventually retired, it was to a sleeping coastal town on the Central Coast. 

My grandfather, Reyes/Ray, was Puerto Rican. He was in the middle of 16 brothers and sisters. He took on many jobs growing up which included working on a cattle ranch in the East Bay across from San Francisco. He took care of the horses and worked the cattle.

At the tender age of 13 (some family suggest it was a little later), at the height of the Great Depression, he decided to go out and make his way in the world. He eventually ended up on the Central Coast where he worked long hours and earned a reputation as a hard worker. This is also where he met my grandmother.

They married in 1942 right after she graduated high school. She was 18 and he was 23. My father was born the following year.

Roberta with her first born, Richard

My grandfather was a hard worker his whole life. His motto: If there's time to lean, there's time to clean. He ran a clean shop! Another motto: Never put anything on credit. If you don't have the money, you can't afford it. A home mortgage was the exception.

Around the time of their marriage, they started their own business and continued that hard work ethic. But in his spare time, he continued his love of working with animals. He had a horse called Silver and a dog called Coco, and the three became famous in the region, participating in all the big parades and events. Coco was a performance dog who could climb up and down ladders, walk upright while carrying a parasol, and loved riding on the back of the horse.

Reyes with Coco on the beach

Reyes with Coco and Silver, Butterfly Parade

My grandmother was the quintessential housewife--staying home to raise a family, kept a beautiful home, and cooked tasty meals for her family.

I feel my grandparents were an amazing couple. She was migrant farmer's daughter and he was the son of a poor rancher. They found each other, created a life and family together, and made a name for themselves with in their community.

They remained married for 47 years before my grandfather passed suddenly in 1989. She never remarried. Because of this couple, they left a lasting legacy that includes four children, eight grandchildren, and 10 great grandchildren.

Can't ask for more than that.


Friday, June 26, 2020

Easy Banana Muffins, Bread, and Cake

My trusty recipe book
As it's been a while since I posted a recipe, I thought I'd add one to my recipe file here. This is my own recipe which I use when I have bananas that are starting to go off. You know the ones. The skins are full of black speckles and they're going soft. You think it's time for the compost, but let me stop you right there. This is when bananas are at their sweetest. Give this recipe a try and see if I'm not right.

Here's what you need

3 mashed very ripe bananas
1/2 cup vegetable oil (sunflower, safflower or something light)
2 average size eggs
1/2 cup white sugar
1/2 cup brown sugar
1 & 1/2 cups all purpose flour
1 teaspoon baking soda
1/4 teaspoon salt
1 teaspoon good quality vanilla (real vanilla, not the fake stuff, make your own here)
1/4-1/2 cup chopped walnuts (optional)

Preheat oven to 350F/180C/gasmark 4

For muffins - Put your paper casings into a 12 muffin pan and set aside

For bread or cake - oil the loaf pan or cake tin and set aside

Here's how to do it

Peel the bananas and mash with a fork.
Add to your mixing bowl.

Add in the eggs, vegetable oil, and vanilla.
Blend until the ingredients are just mixed.


Add the sugars, flour, baking soda, and salt.
*Chopped walnuts are optional.
Blend until all the ingredients are well-incorporated.
DON'T over-mix.

Spoon the batter into your prepared muffin casings.
Of if you're making bread or a cake, pour into the prepared pan.

Slide the pan into your preheated oven, middle shelf.

Timing

For muffins - bake for approximately 30 minutes.

Use a toothpick to test the center of the muffin.
If the toothpick comes out wet, continue baking for another 10-15 minutes, or until done.

*This time is for average size muffins. Large muffins will take 40+ minutes to bake before testing.

For bread or cake - bake for 1 hour before testing. Use a toothpick as above.

Cooling

When done, remove the muffins from the pan and set on a wire rack to cool.

Why, yes, my muffins are lopsided. It's an old oven and I forgot to rotate the pan.
Hashtag #HomeMade :)

* For bread or cake, leave in tin for about 15 minutes to cool before turning out onto a wire rack to complete cooling.

Topping?

Adding a topping to this recipe is up to you. This recipe will yield a very moist muffin/bread/cake and probably doesn't need anything on top. At least, I don't think so.

Storage

Muffins store well in a large ziplock bag or covered container. The bread or cake will store well under plastic wrap on a plate.

Double your recipe and store some in the freezer Wrap in wax paper, then put into a large ziplock bag or wrap in foil.

Yield

This recipe makes 12 regular size muffins or 6 large muffins, 1 bread loaf, or one cake layer. Make a second recipe to create a layered cake.

ENJOY!!

(don't forget to lick the bowl!)

Tuesday, February 11, 2020

Watering Day: Moth Orchids and Air Plants

Watering day.

I thought I'd share how I take care of my Phalaenopsis Orchids...aka Moth Orchids. Once you get into a routine, it's pretty easy, IMO.

I sink-soak about every 6-8 weeks. It gives the orchid bark a chance to soak up some water, and gives the plant a drink through the roots. I run the water through the top of the pot and let the runoff fill the kitchen sink about half way up the pots. Then let them soak for about half an hour.


While the plants are in the water, I use a soft cloth and wet it in the sink water and use it to gently wash the dust off the leaves. Currently, there aren't any flowers, but if there were, I would pay extra attention to NOT get them wet.

After about 30 minutes, I pull the stopper and let the pots drain away and dry out for a while.

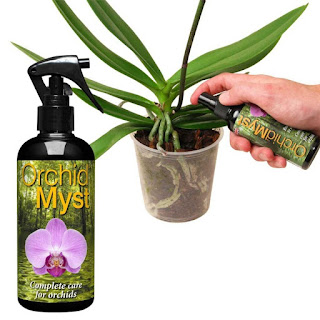
At this stage, I spray on some Miracle-Gro Orchid Plant Food Spray or Orchid Myst from Advance Nutrition directly onto the leaves and roots and leave in.


Once I'm satisfied the pots are dry enough to move, I replace them into their container pots where they live on a table near a northeast facing window in a bright room (orchids don't really like lots of light, but prefer a bright room vs a sunny room, if that makes sense).

Then, every 10-14 days, depending on the time of the year and the heat index, I'll use a handheld mister (clean spray bottle with tepid water) and give them a good misting, leaves and roots.

Because I've soaked the bark, I probably won't have to mist for at least 3-4 weeks. The damp bark will create condensation inside the pot which the roots will drink from, and humidity from inside the pot rises up to give the leaves a boost.

I've added a close up of my big boy to show the annual leave growth and mature roots. Also the purple coming out in the leaves (you can also see this in photo 1). Totally natural in orchids with purple/fuchsia-dominant flowers. I had double spikes last year and hope to see those again this year.


  • Side note, my plants are still in their nursery pots which are a standard 5 inch pots, though I also have a mini orchid in a 2 inch pot.
  • Also, yes, orchids are ready for repotting which I'll be doing soon. If anyone's interested, I can photo that process. Let me know.

Bonus photos:

Along with the orchids, I'm soaking my Tillandsia. I do this about once a month, or when I'm soaking my orchids. Similarly, I mist them about every week or so until they get soaked again.

Interestingly enough, I find my Tillandsia get nearly the same treatment as my orchids, so I won't repeat my notes from above for these guys.


I bought the Tillandsia argentea (wispy one) about five years ago. It's quadrupled in size and it blooms every year with tiny purplish flowers.

Two Tillandsia Ionantha, one red and one green. The green has a baby already.

And the one from my wish list, Tillandsia Xerographica. With so many curls, I have a hard time displaying it.

Finally, as I was watering the rest of my crew, I noticed my ZZ is throwing a TT (Zamioculcas Zamiifolia - temper tantrum) and threw out one of it's stems. Admittedly, it was a little squishy (the rest of the plant is fine), so I cut it back just below a newly forming node and have put it in water to see if I can get it to root. Wish me luck.


I hope my orchid notes help some of you struggling to keep your beauties vibrant. Let me now if you have any questions. It's as easy as sending me a private message with the emailer on the side bar. I reply to all messages.

Have questions about your houseplants, or your roses, let me know.